Microscopic preparation of amber

EN RU

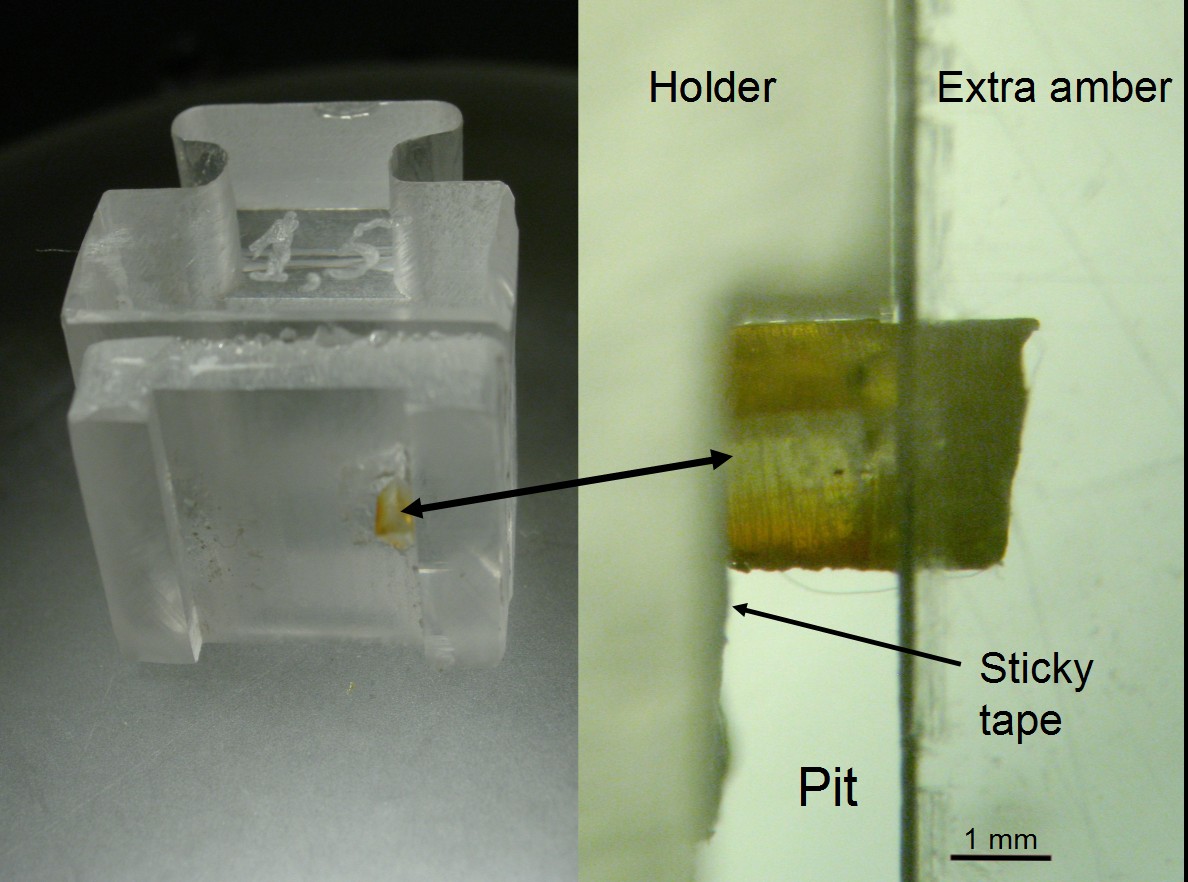
To hold a sample, one can either clamp it (while controlling the clamping force), or adhere to something. Each of our devices implements one or the other option. Moreover, a control over the amount of material to be removed is essential to avoid occasionally removing too much.

The polishing itself, as well as microscopy of the amber inclusions and their storage, are discussed in a paper

Sidorchuk, E.A. (2013). New technique for preparation of small-sized amber samples with application to mites. In: Azar, D., Engel, M.S., Jarzembowski, E., Krogmann, L., Nel, A. & Santiago-Blay, J. (Eds.).Insect Evolution in an Amberiferous and Stone Alphabet. Proceedings of the 6th International Congress on Fossil Insects, Arthropods and Amber. Brill, Leiden-Boston, pp. 189–201.

The latest paper describing the method is published in Palaeoentomology:

Sidorchuk E.A., Vorontsov D.D. 2019. Preparation of small-sized 3D amber samples: state of the technique. Palaeoentomology, 1(1) DOI: http://dx/doi.org/10.11646/palaeoentomology.1.1.10

If you study tiny amber fossils and wish to use our method of preparation, you can request the current set of holding tools from us by just writing an email to Dmitry (see 'About authors' section). We will send them to you free of charge.

You may also try to use this documentation to manufacture them yourself.

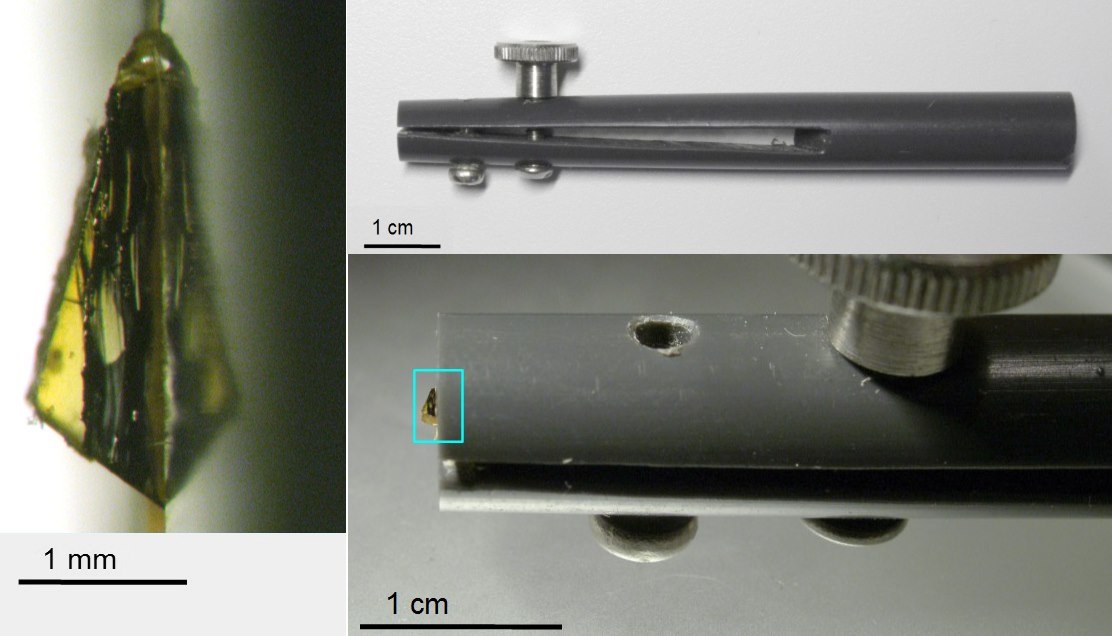
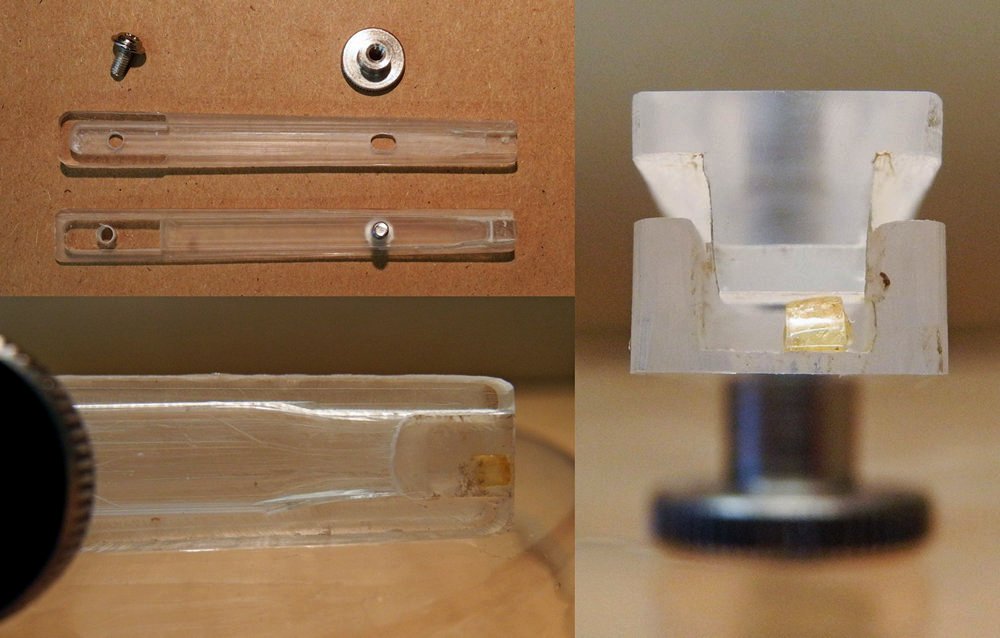
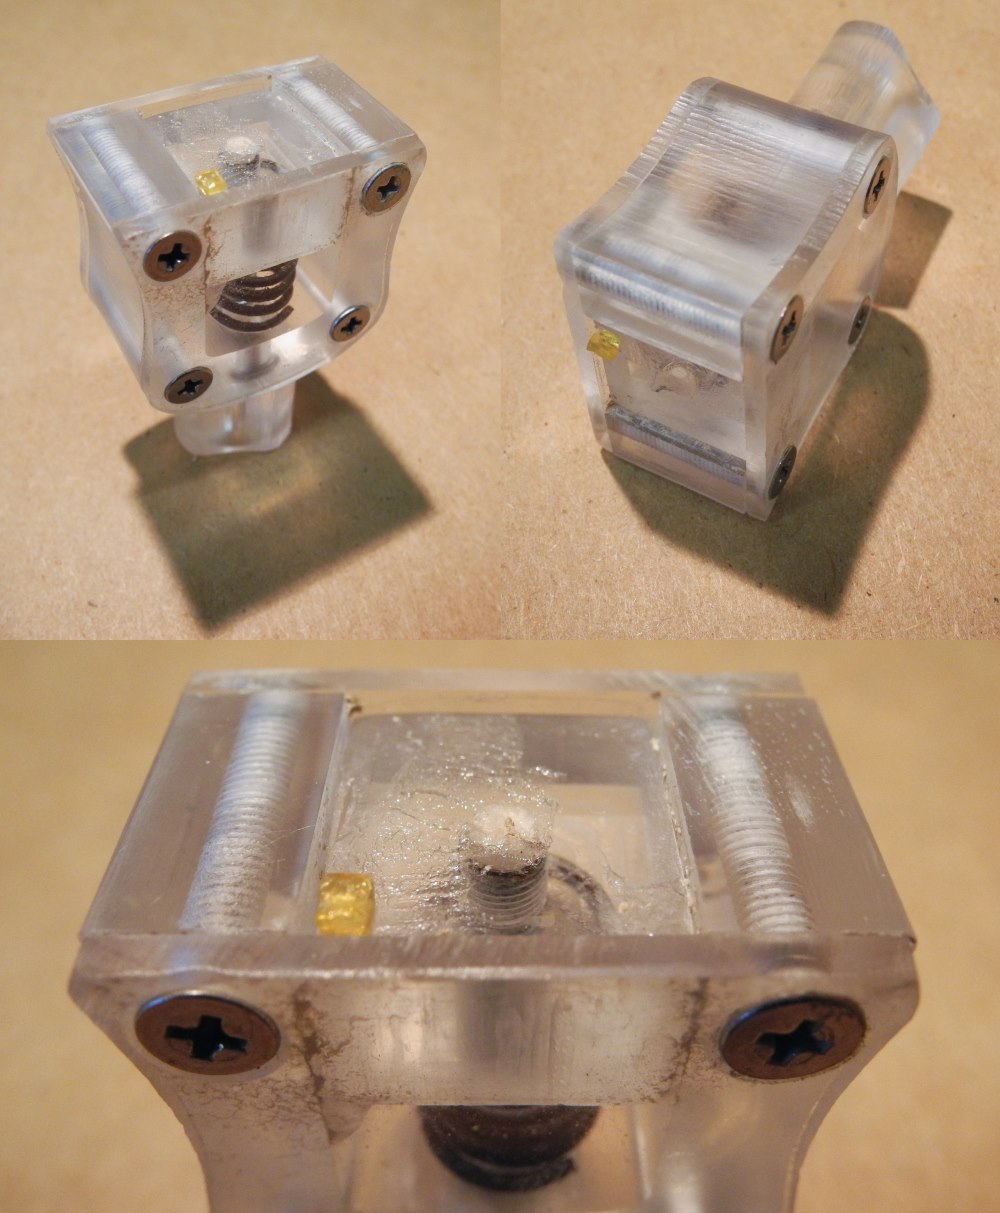
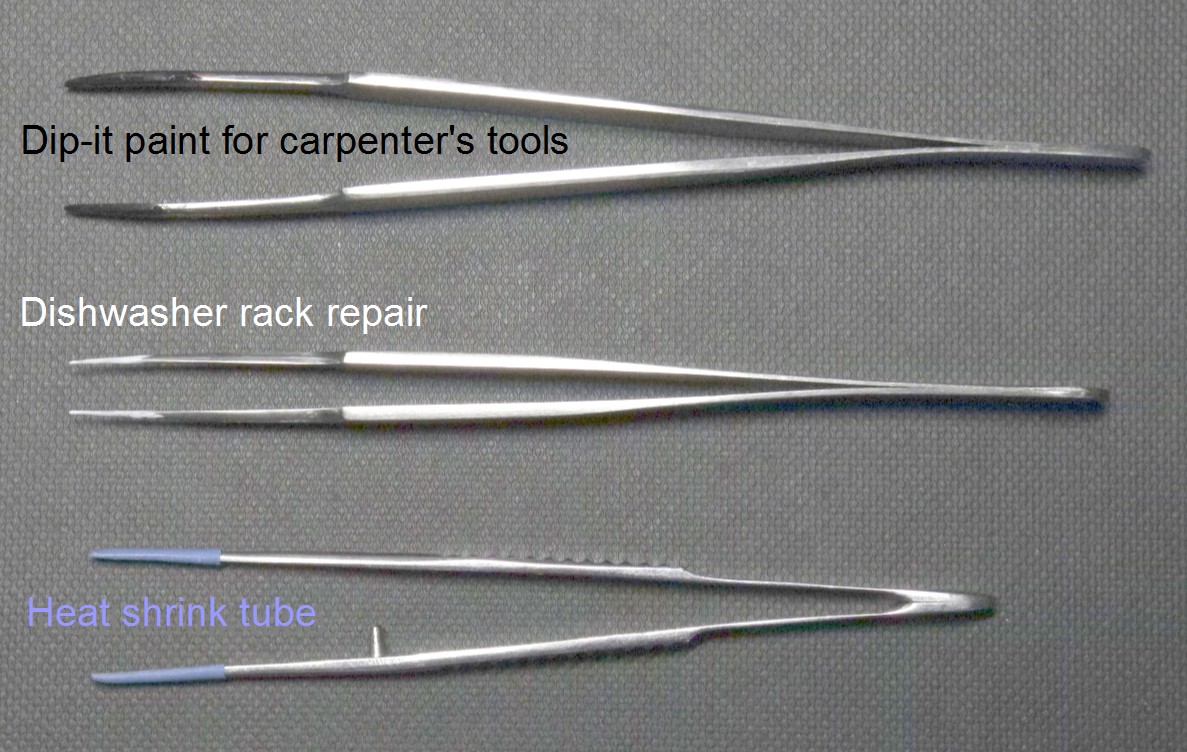
Here is a toolset which we currently use. Below it you may find other tools which we used and abandoned, but you may still find them useful for some task.

"The Bell"

Shape of this device gave it its name.

The sample is attached with a double-sided sticky tape or another reversible adhesive to surface of the piston, the piston position is adjusted to only allow the part of the sample to be removed to be outside of the bell. Then the bell together with the sample is brought to the polishing machine, against the rotating grinding disc. The piece is protected by the walls of a bell, and the only part being removed is that left outside the device.

All plastic parts are made of transparent 10 mm acrylic with the CNC milling machine, followed by drilling and cutting of threads. The movable piston has an M4 screw glued into it in such a way its head can rotate inside the piston. The screw passes through the nut with a nylon ring in the roof of the bell. On the outer end of the screw, a plastic handle with an embedded (pressed into it) nut is screwed. The device can be put on a flat surface with the specimen facing up for the scrutiny of it under a dissecting microscope. The process of polishing is regularly interrupted by observation of the specimen.

Plastic forceps

Forceps made of a transparent plastics, allowing to clamp a sample gently, while visually controlling the (sticking out) part of the sample to be polished away.

We use two kinds of plastic foreceps, for larger and smaller pieces.

The forceps comprises two complementary parts, each made on the CNC milling machine from a transparent plastic (we use 5 mm-thick acrylic). At the rear end of the tool, its parts are tightly fit and connected with a screw, while the front (working) ends are spaced apart. This allows the forceps' jaws to be brought together in a clamp-like manner, with another screw and a knurled or winged nut.

An important feature of this smaller forceps is that one of the jaws is very thin in the central part, while both parts do have enough thickness elsewhere to provide a certain rigidity. This allows for observing the sample through the transparent plastic of the jaw, thus providing a better control over position of the sample itself, not only of its part sticking out for removal.

Pit holder

The device consists of a handle and a set of heads, each with a pit of a given depth.

All parts of this holder were produced with the CNC milling machine of acrylic (plexiglas). Each head is a combination of two parts, which are glued together (Cyanoacrylate or Acrifix 192). Initially, we used material thickness of 15 mm (in later versions – 10 mm) for the handle and the head part complementary to it, and 5mm-thick material for a pitted pad.

At the moment we have abandoned this device in favor of a more compact and versatile version ("Bell"). This also spared us the combination of the complementary parts, which required high-precision milling (not readily achievable).

The sample is attached to the bottom of a pit with a piece of a double-sided sticky tape (we used 3M 969). Only the part of the sample intended for removal (polishing away) is supposed to stick out of the pit.

Slit holder

This is a clamp with wide, almost parallel screw-driven jaws. Fairly simple to implement.

It is made of any suitable elongated piece of plastic, cut as accurately as possible along the longitudinal axis. We have done it with a miter saw, and the depth of a cut was 10–15 cm, only leaving 2–3 cm intact. Our material was a PVC rod with a diameter of 10 mm or 15 mm, width of cut 3–3.5 mm. It is preferable to make a slit somewhat off-center to provide sufficient flexibility of one of the jaws.

Jaws of the clamp are driven together with the screw (the thicker jaw having a thread or an embedded nut) and a wing nut. To keep the clamp strictly convergent, another screw with a complementary hole is installed closer to the working end of the tool.

Presently we have abandoned this device in favor of the plastic forceps, which are more secure and convenient, allowing for more visual control over the sample.

Plastic forceps

The photo shows disassembled forceps, and a sample clamped in forceps, ready to be polished.

"Bell"

Compact analogue of the pit holder with a set of heads, allowing to adjust the depth of a pit, where the sample is attached.

One of the first versions of the 'Bell' with the amber sample attached is shown in this photo

Syringe with polyethylene glycol

Quite versatile and widely used method to hold any small sample of complex shape in a reversible way is to embed it into a piece of suitable material of larger size. Materials in use for this purpose are wax, paraffin, and even chocolate.

Not any of these materials is suitable for working with amber, however. For example, the seal wax has overly high temperature of softening and is not always easy to remove from the sample; the traces of chocolate encourage development of the microorganisms; paraffin is only removable mechanically, which implies certain risk to the polished surfaces, and may leave the oily contamination in the amber.

For the moment, the best option is a polyethylene glycole (PEG, with molecular weight 1500). It has a low temperature of softening (ca. 50 degrees Celsius) and is readily soluble in water, which eliminates a problem of its removal from the sample. For the ease of operation, a syringe is filled with the melted PEG, then cooled down and cut. This PEG plug is then softened on a cup heater, a piece of amber can be gently pushed into the medium, then it cools down for polishing, much like shown in this earlier paper Sidorchuk, E.A. (2011). Preparation of six-sided micro-samples of Baltic amber for study of organismal inclusions. In: Kostyashova, Z.V. (Ed.).Amber Mining and Processing in Sambia, 12–14 May 2010. International Symposium Materials. Kaliningrad, pp. 47–53. It is available on ResearchGate.

We are very grateful to Pedro Viergas for his suggestion to use the PEG and to Grigory Bondarenko for giving us the PEG with the desired combination of properties.

Metal forceps with softened tips

Although metal forceps are not suitable to hold a sample when polishing it, they are useful for manipulating it, taking the sample from one holder and putting into another or rotating it while observing under the microscope. To avoid scratching the surface of the sample by the metal tips of the forceps, we coat them with the soft polymer or put a heat shrink tube onto them. Presently we found the "Rerack Dishwasher Rack Repair" to be most suitable for this task.